After several years of deferring what I knew was a very necessary job, Clint and I replaced the suspension in my car this weekend. I did the springs and steering a while ago, as the steering shaft had basically seized solid (and this had in turn caused the pinion gear in the rack to be worn smooth) and someone had tried to lower the car years ago by blowtorching the springs. They were all twisted and warped and just doing nothing to hold the car to the road. These changes made a huge difference at the time, but I realized I wasn’t quite done.
Time to change all that.
First, the parts.
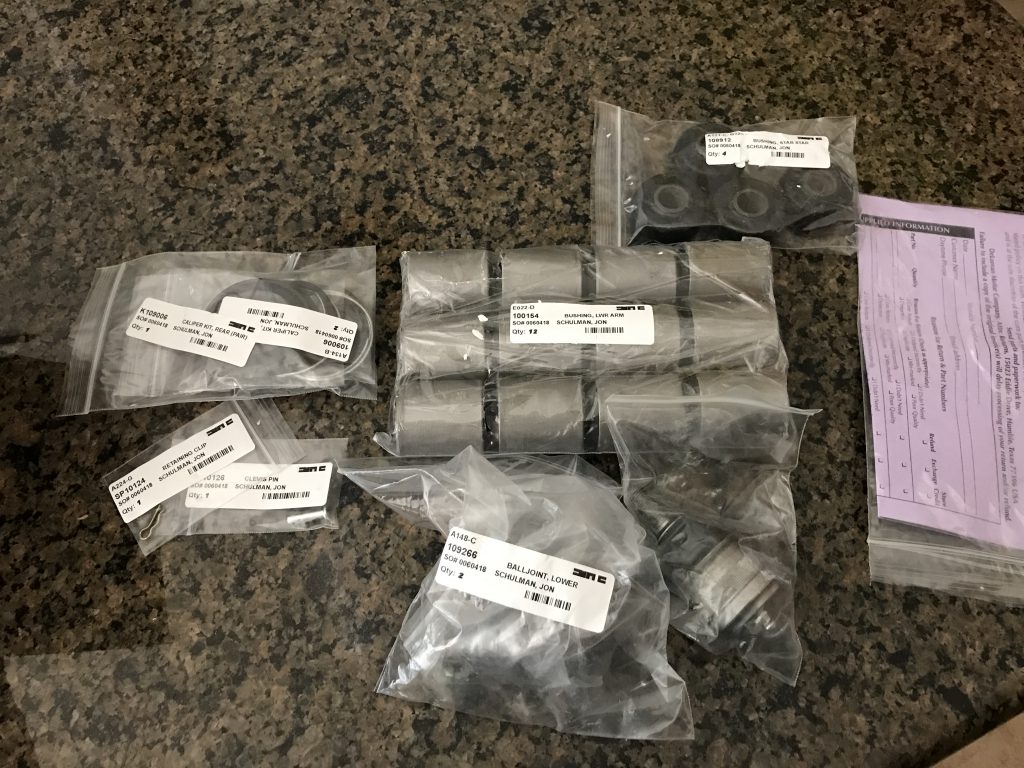
A big box full of various bushings arrived first – the long cylindrical ones will be pressed into the rear links and front control arms, while the round ones will support the sway bar.
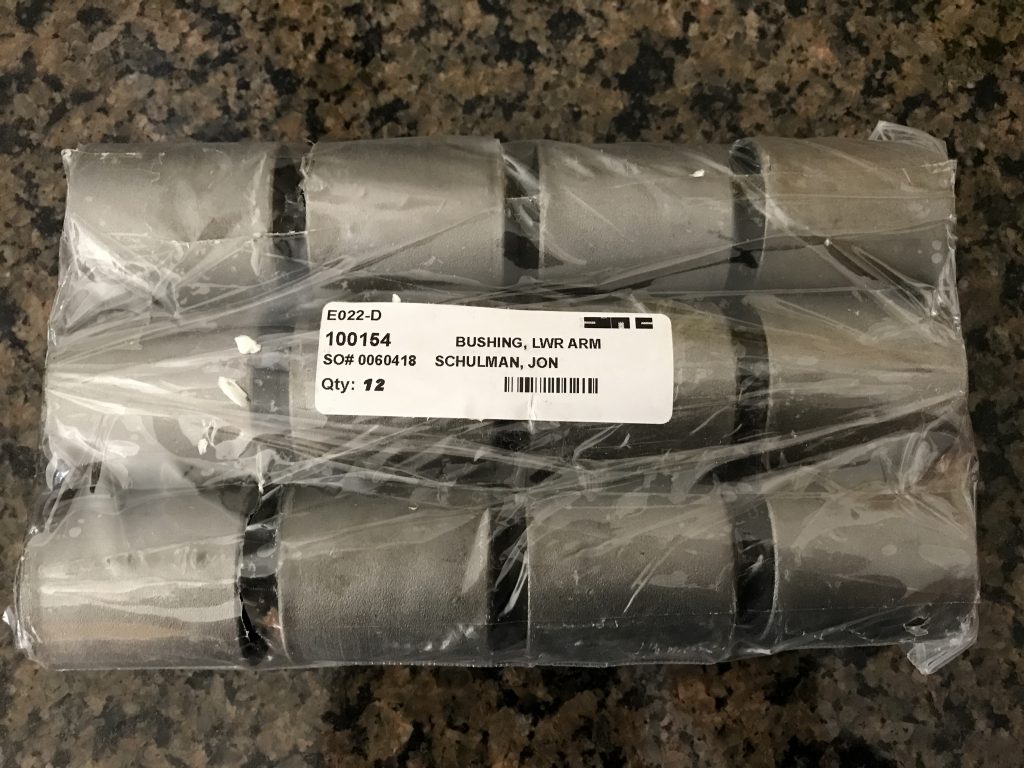
A huge pile of link bushings.
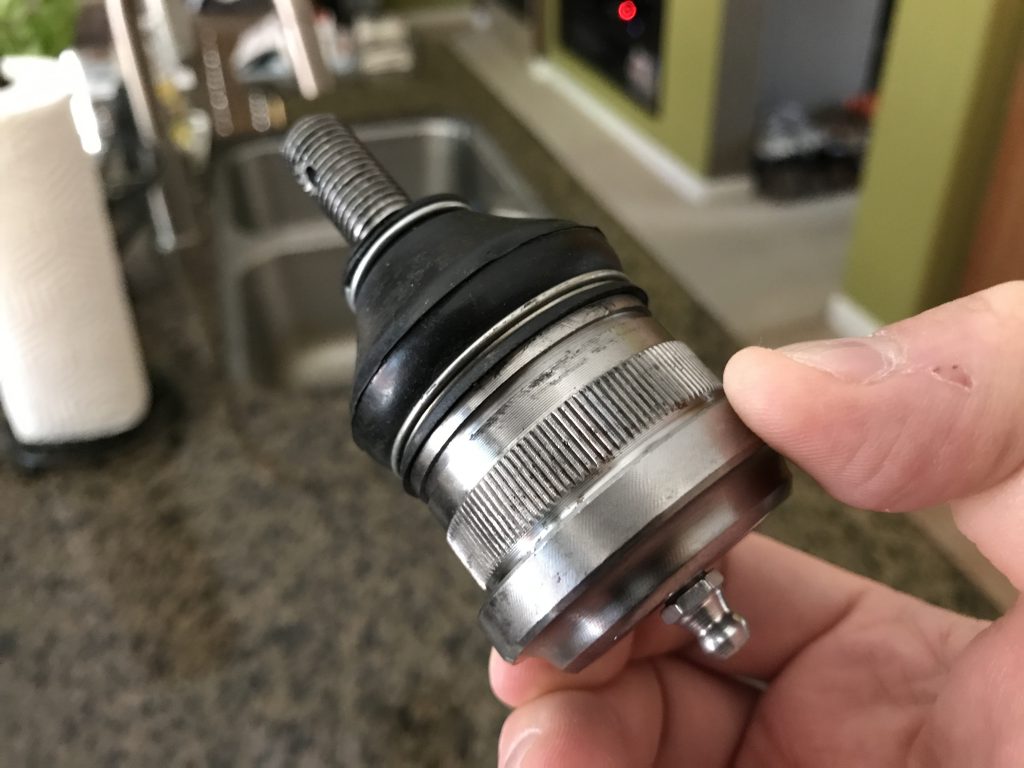
The most exciting thing in this box, however, were the brand new custom made lower ball joints. They’re perfectly machined and just a beautiful thing. For many years, DeLorean owners were having to take old VW ball joints and modify them to fit the car – a dangerous proposition as the strength of the part was greatly reduced by the modifications. These are purpose-built and just awesome – there’s no excuse for going with anything else.
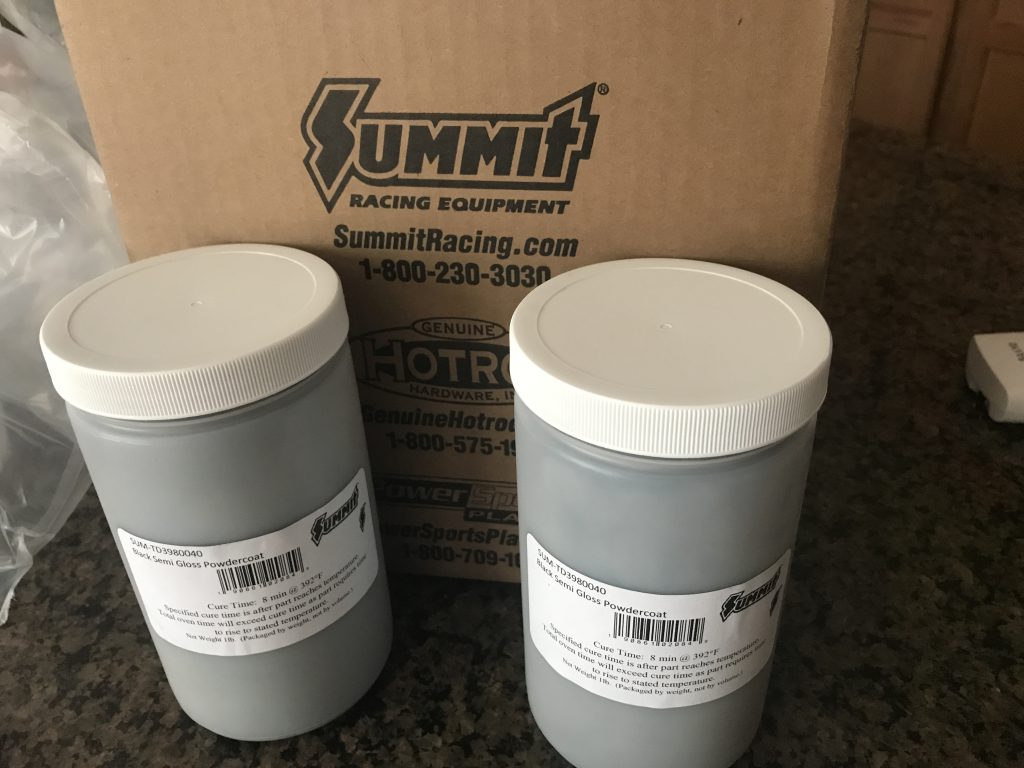
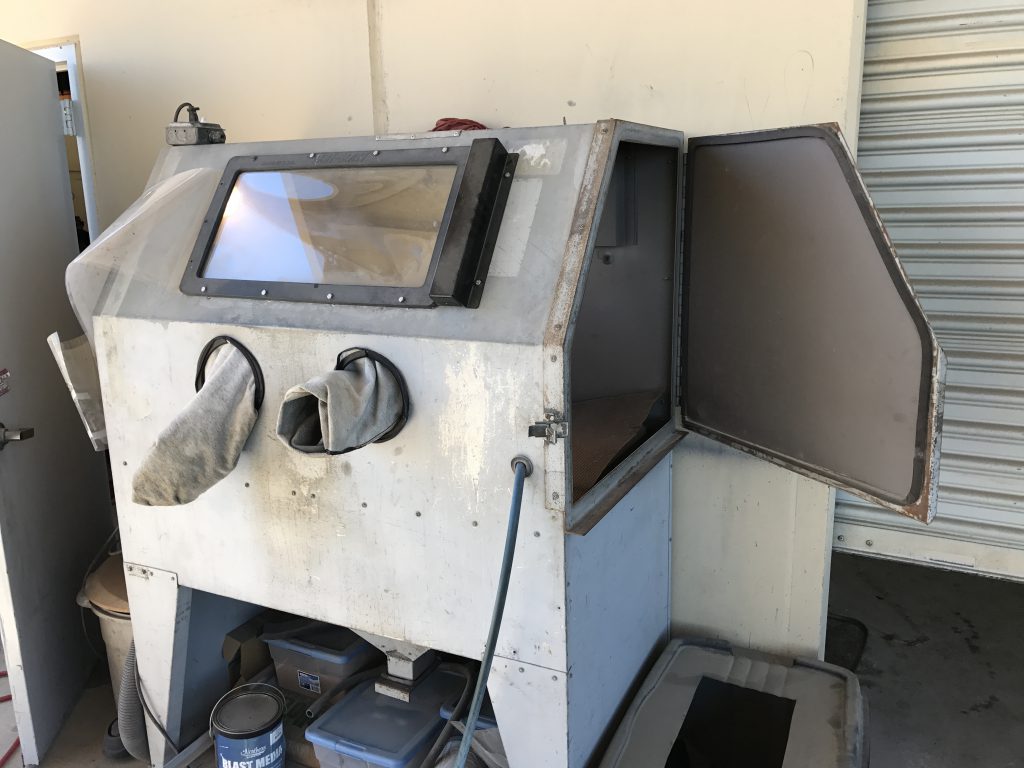
A box arrived from Summit Racing, filled with black semi-gloss powdercoat media
But then the really exciting stuff arrived. In a box all the way from The Netherlands, from where DMC Europe ships some of the finest performance-enhancing parts in the world.
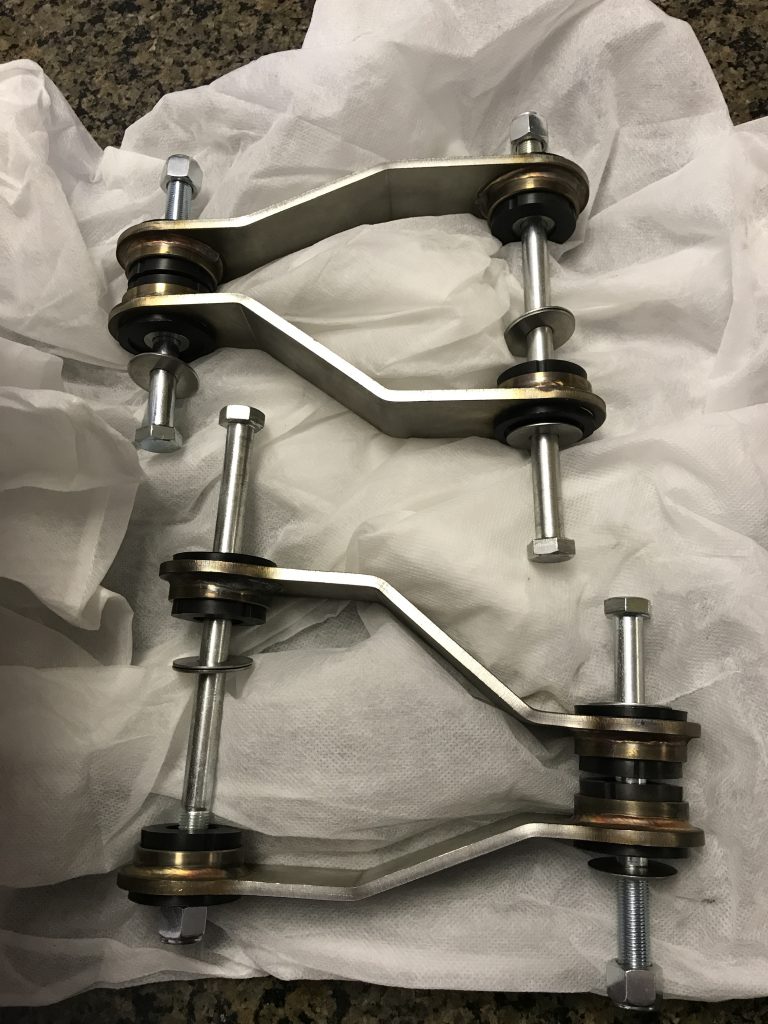
First up are these amazing control arm braces. Made from solid stainless, these attach the pivot point for the front lower control arms directly to the base of the shock, effectively turning the lower arm into a full wishbone. More on this later.
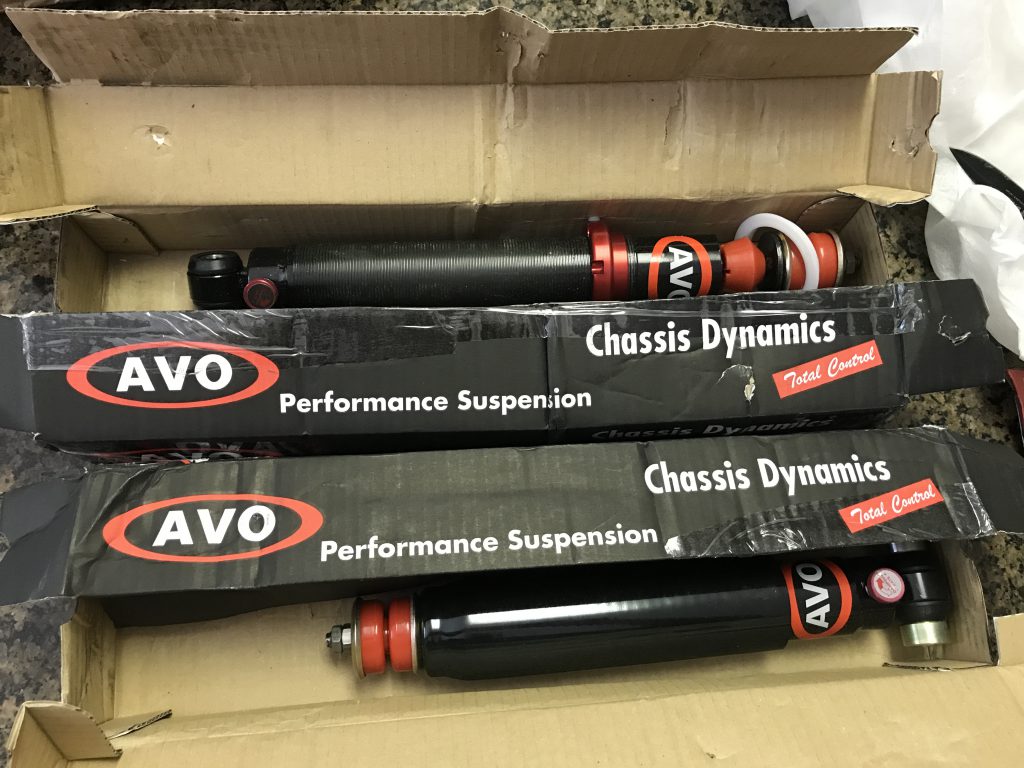
And lastly, the piece de resistance – custom made, adjustable height, 14-position adjustable damping AVO shocks, complete with polyurethane bushings all around.
Enough unpacking. On to the good stuff.
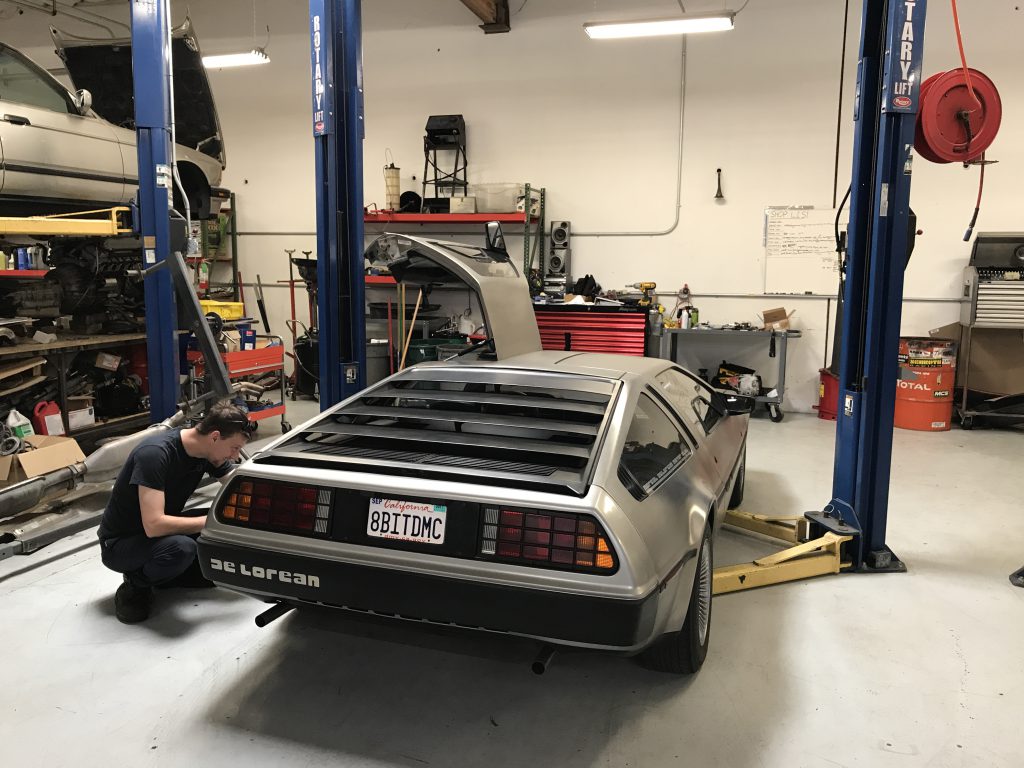
Now, usually I like to do my wrenching in the comfort of my own garage. But there are some jobs that you just need the proper tools to accomplish – and this was one of them. Clint was good enough to offer up use of his bay, tools and considerable skills for the day – so I headed up to Sacramento and we got to work.
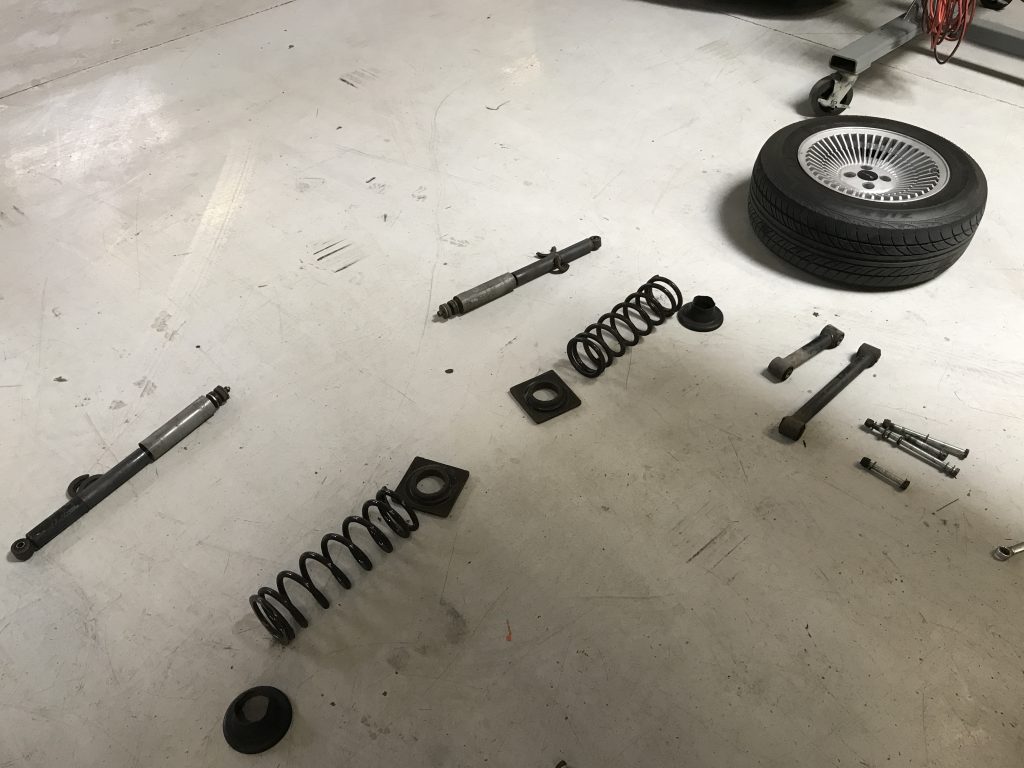
The first thing that had to happen – removing all the old bits. Here you can see basically the entire rear suspension (except the radius arms) laying on the ground under the car.
It actually looks kinda good in Hover Mode, doesn’t it? For some reason the lines of the car make it look like it really shouldn’t have wheels. Or maybe that’s just the movies influencing me. Either way, this was a funny sight.
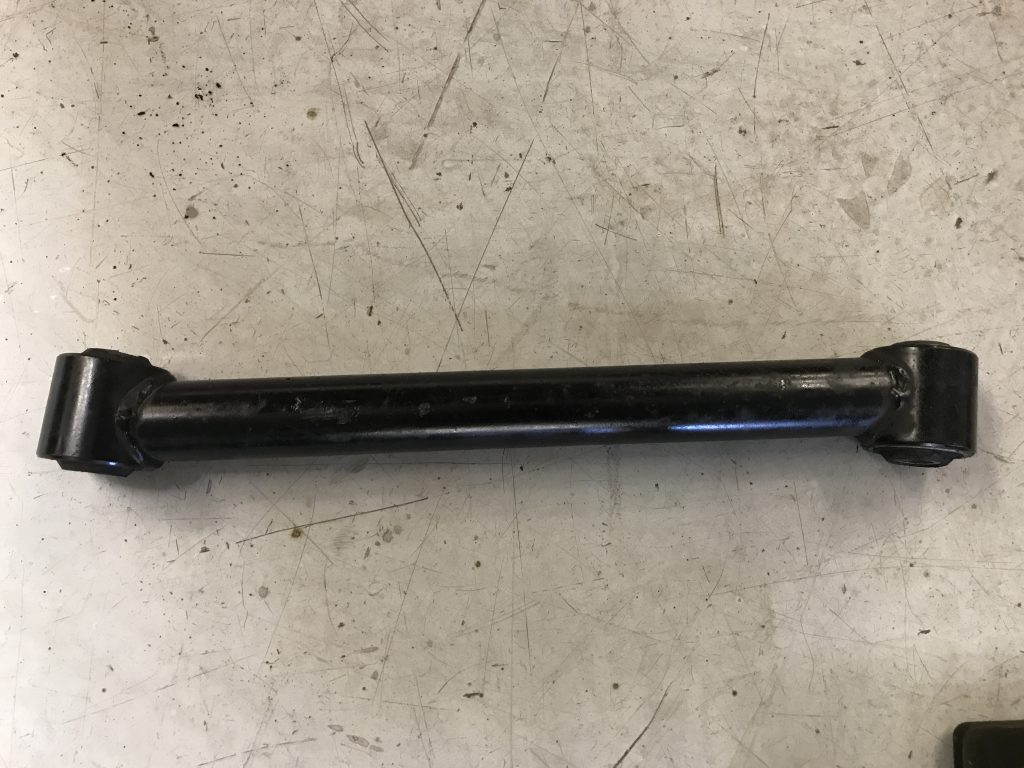
We decided to blast, clean and powder-coat as many of the factory parts as we could. Here you can see one of the rear links. It’s actually quite clean and the paint in very good shape, considering.
But, a little time in this cabinet would remove all that. Actually, it took a lot of time for those links. The paint was so well adhered that it took forever to blast off. And it seemed even longer than it was, since the blasting cabinet is outside in the 110 degree sun.
A fully blasted and cleaned link, no paint remaining.
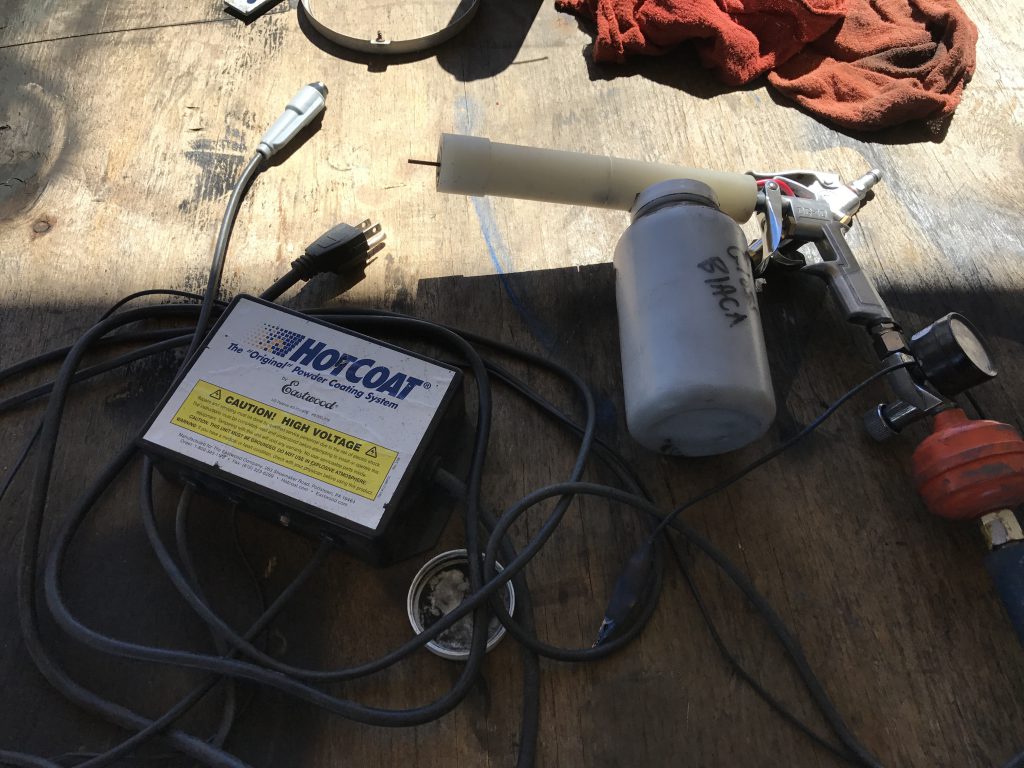
Next it’s time for this bad boy.
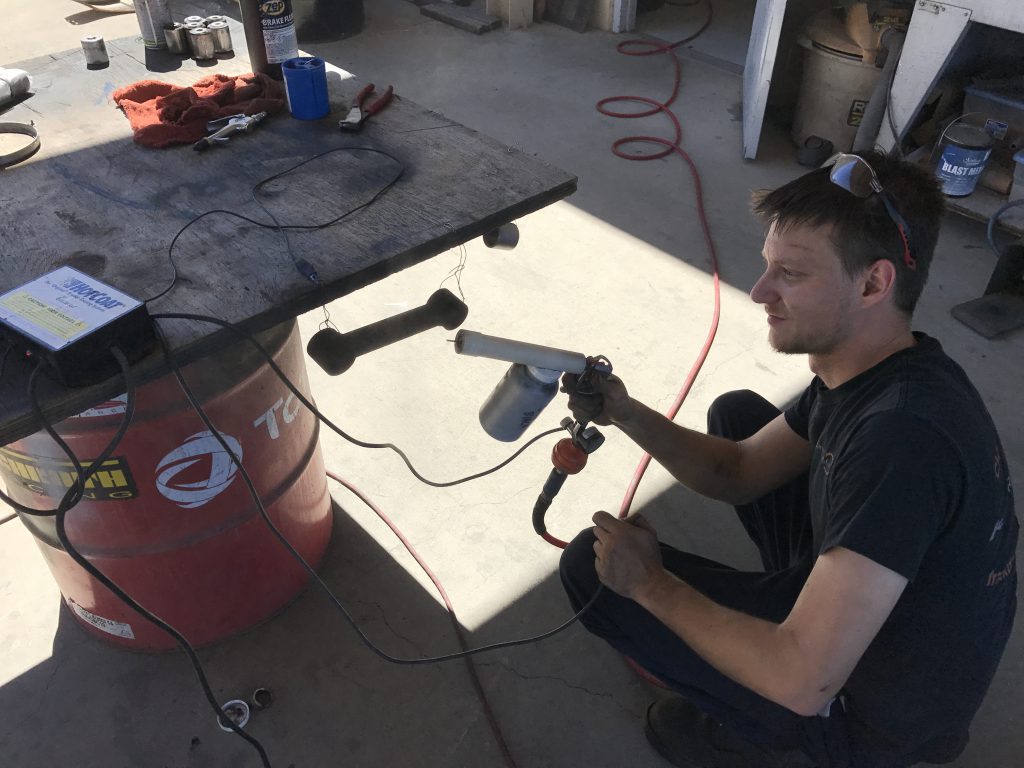
By applying a ~15,000 volt current to the metal part, the powder coating system creates a magnetic charge that attracts the fine particles of the media. You then bake it in a hot oven for about 30 minutes (with a temperature change halfway through), and the results are…
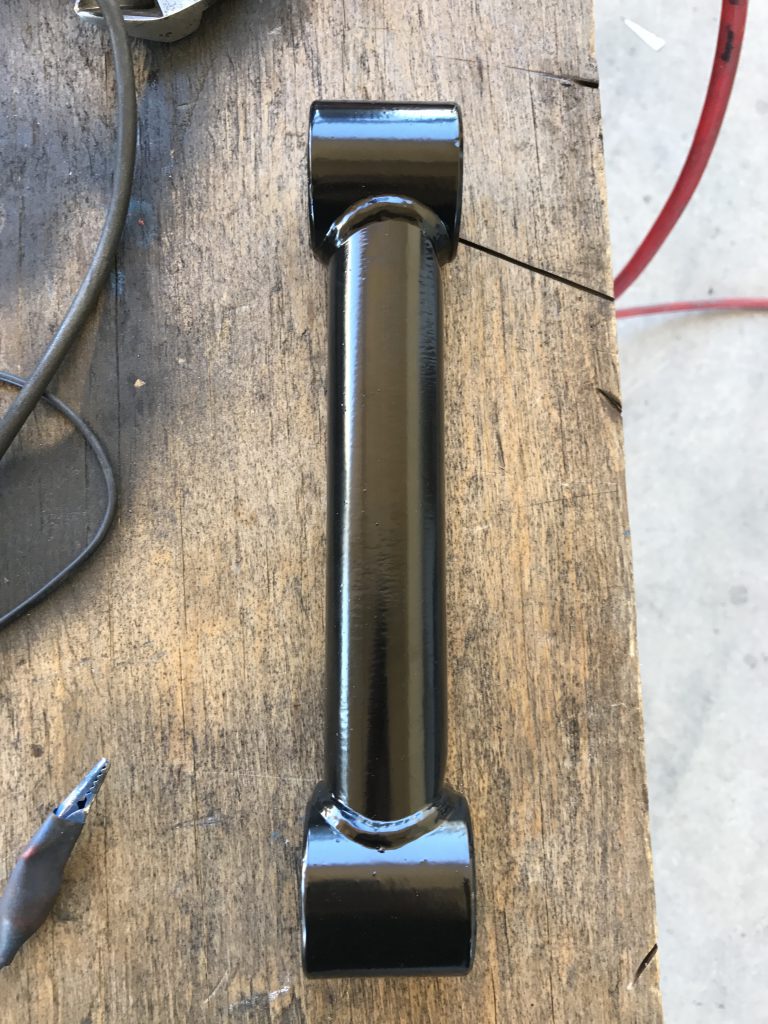
Pretty amazing. A hard, durable, uniform coating that will stand the test of time. These came out really, really beautiful.
With the links all cleaned up, we pressed the bushings into them (4 on each side) and reassembled the rear suspension.
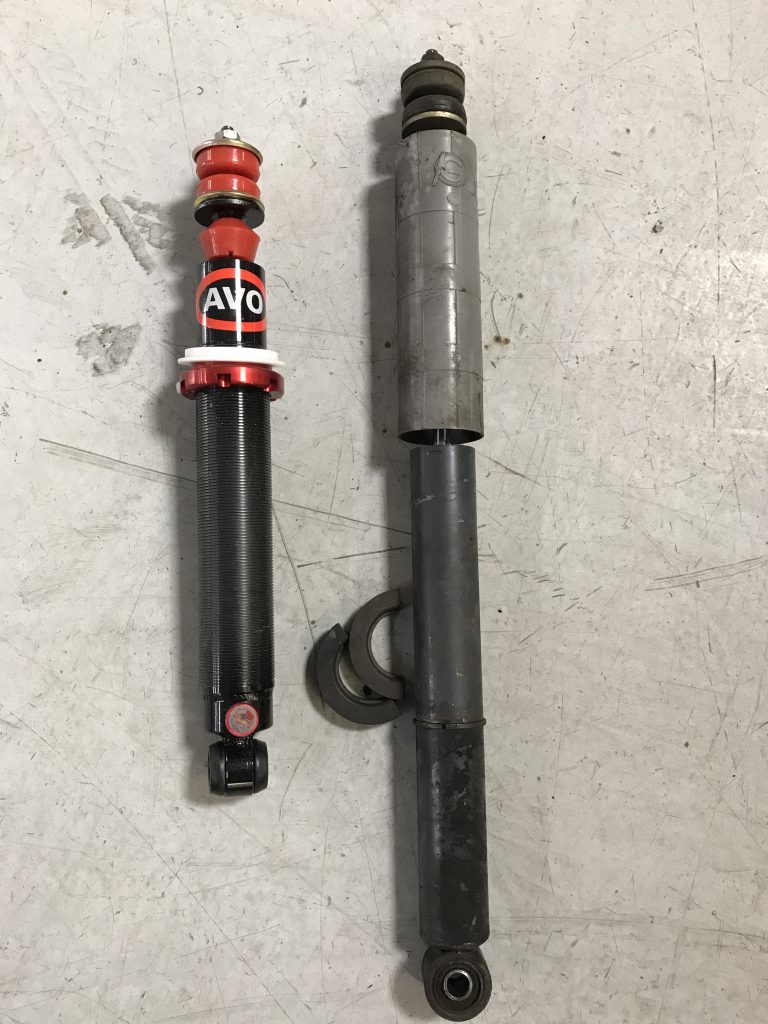
Here you can see one of the new rear shocks compared to the 36+ year old factory Girling. To be honest, I think it’s quite rare to get quite as much life out of a set of shocks as these gave, but as you can see the new ones are quite an upgrade in appearance, quality and technology. The red collar on the new shock allows for the adjustment of the ride height, which we set to be the same as it had been previously. The small red knob at the base is a 14-position variable valving mechanism that allows for totally adjustable damping rates. To start, we set it right in the middle at position #7. And then kept it there.
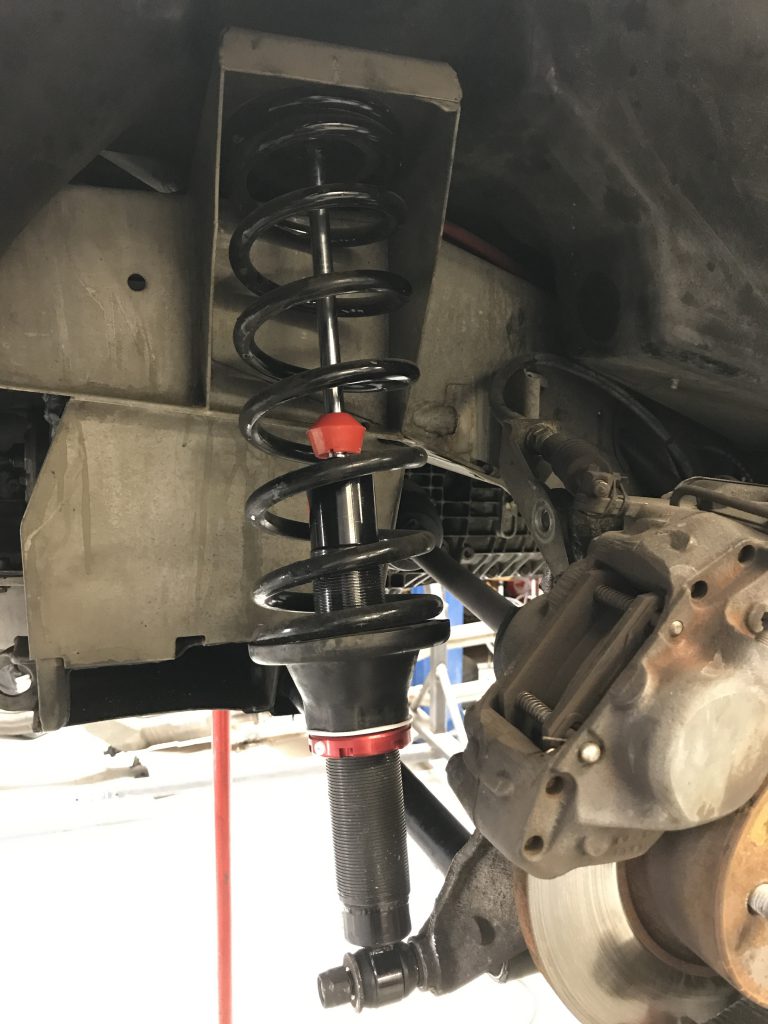
The rear suspension is pretty simple to work on, and so went back together very quickly. Here you can see the new shock installed and the newly coated links connecting the wheel carrier to the frame behind it. Remember that the springs are also upgraded, but had been done previously.
Now on to the front!
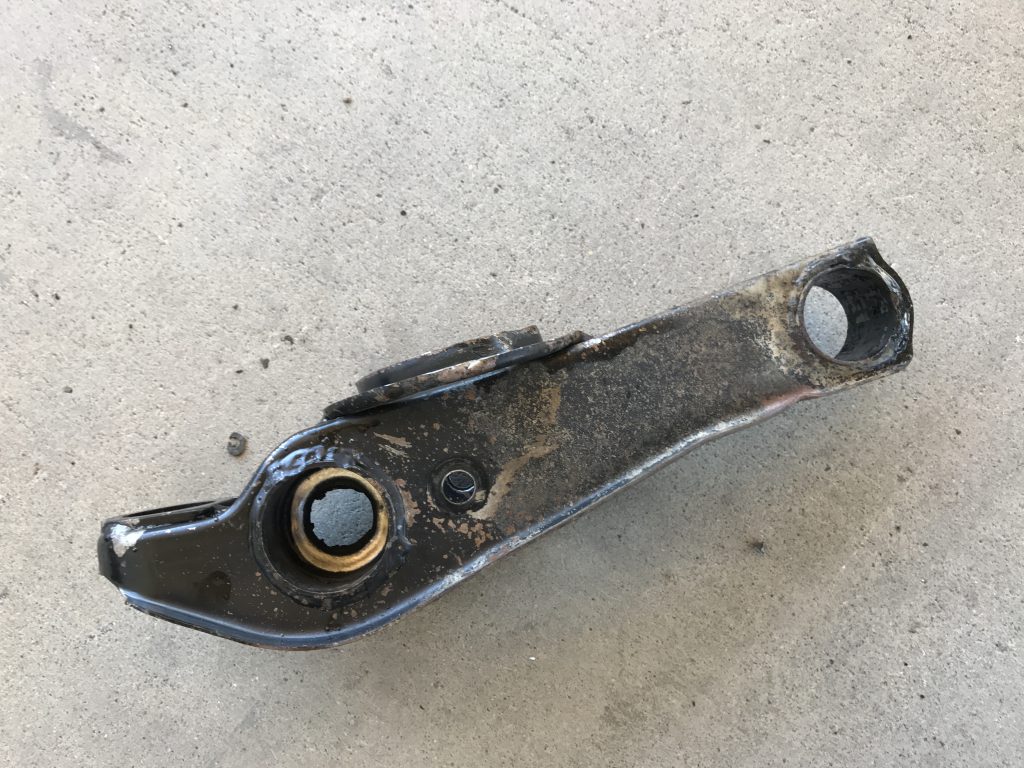
This is one of the front lower control arms. The paint here didn’t hold up anywhere near as well over the years – lots of flaking, corrosion, and general road muck had really hurt the beauty here. These are also a structurally weak design – completely open at the bottom, they can be prone to cracking while the vehicle is in motion and causing significant damage or injury. Fortunately nearly 40 years of field testing has proven there’s a pretty simple way to fix that with a welded shoe plate. First, though – it has to be cleaned.
After just a few minutes in the blasting cabinet, these look simply immaculate. The paint on those rear links was like the orchestra on the Titanic, but the paint up here was more like “it’s cool, I’m only here because my mom made me” and came off very, very quickly.
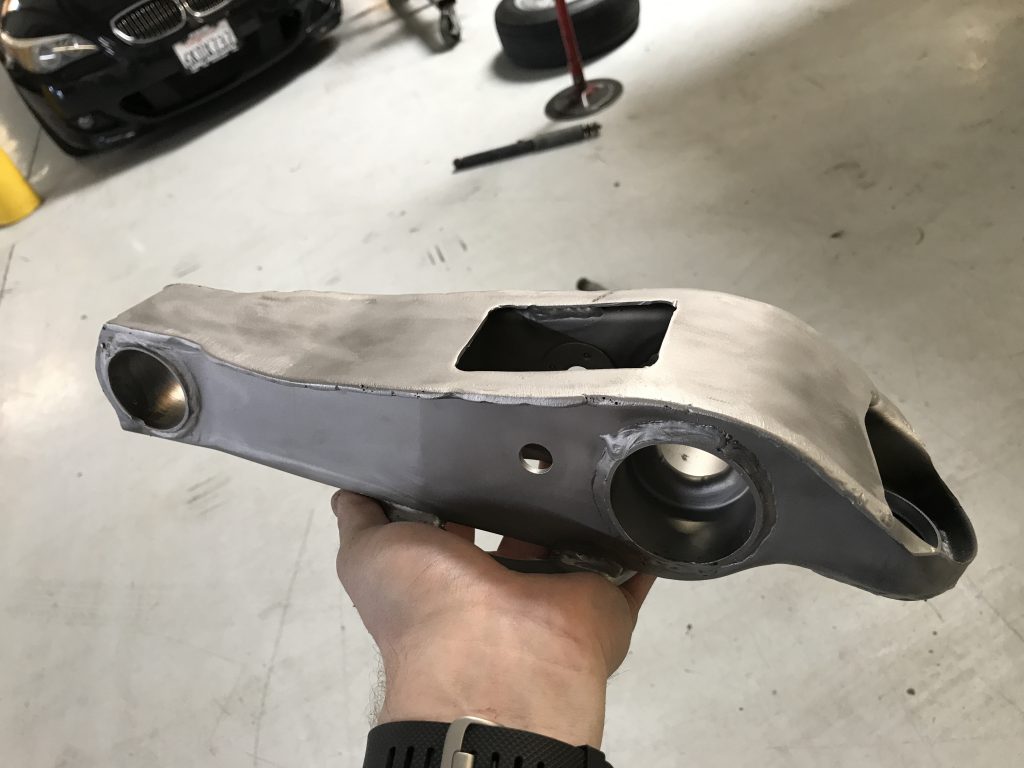
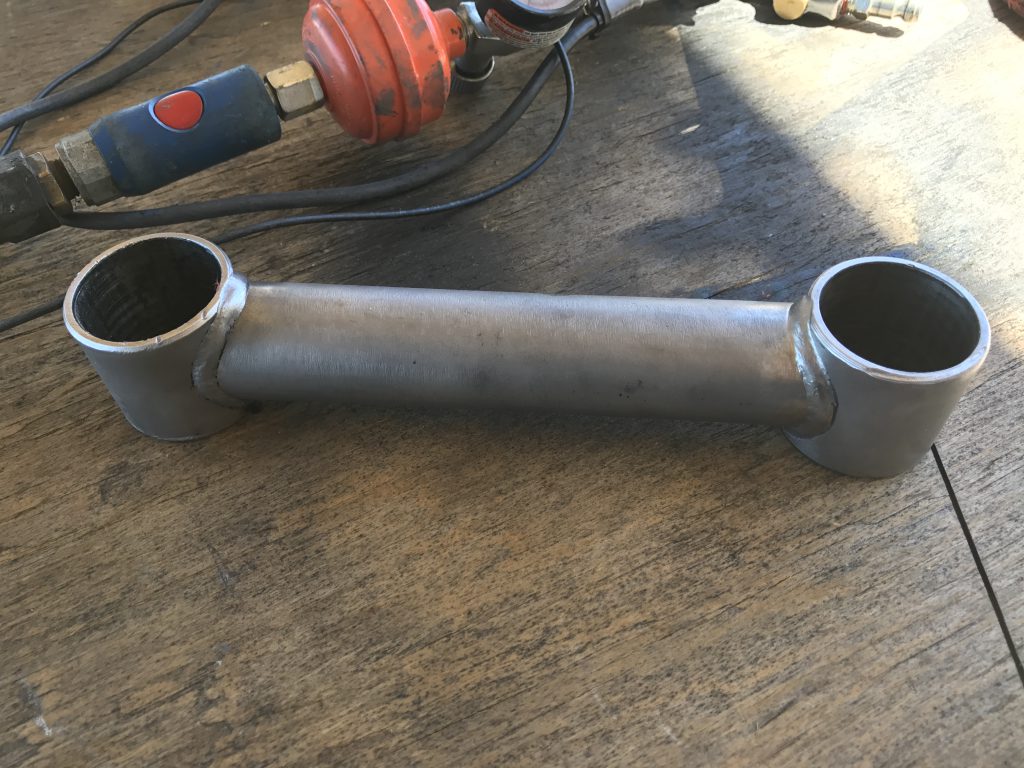
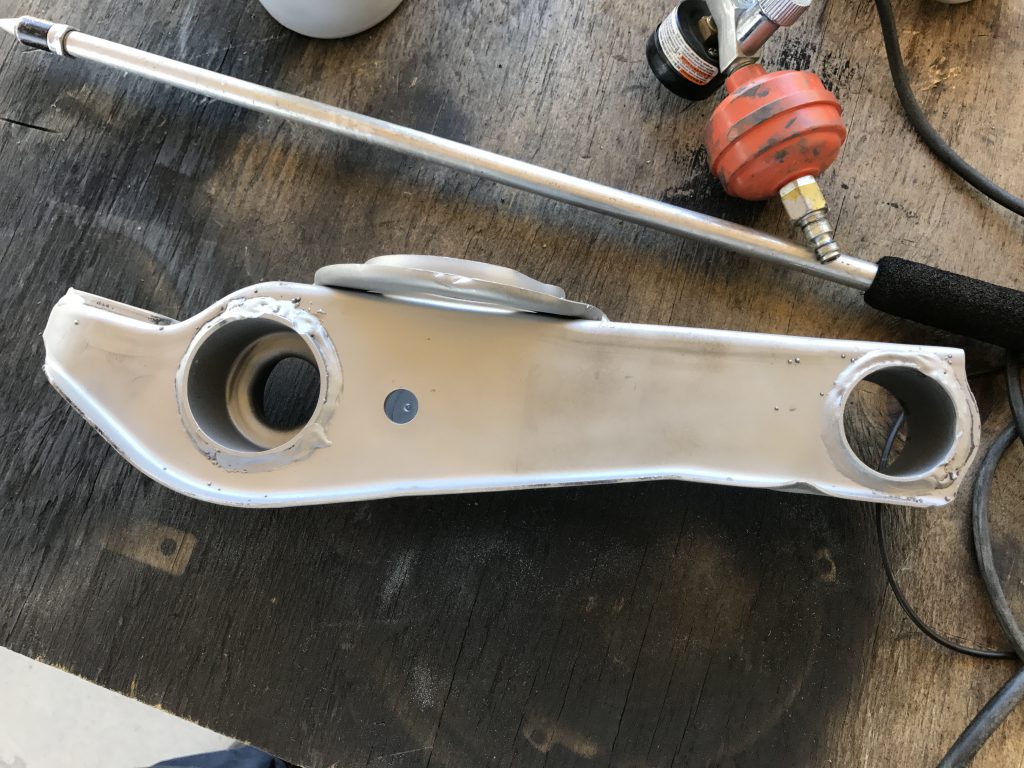
Once the blasting was done, Clint reinforced the whole arm by fully welding all the areas that were simply tacked together and adding this entire base plate. This arm was completely open at the bottom before – the whole top section was just built in this picture.
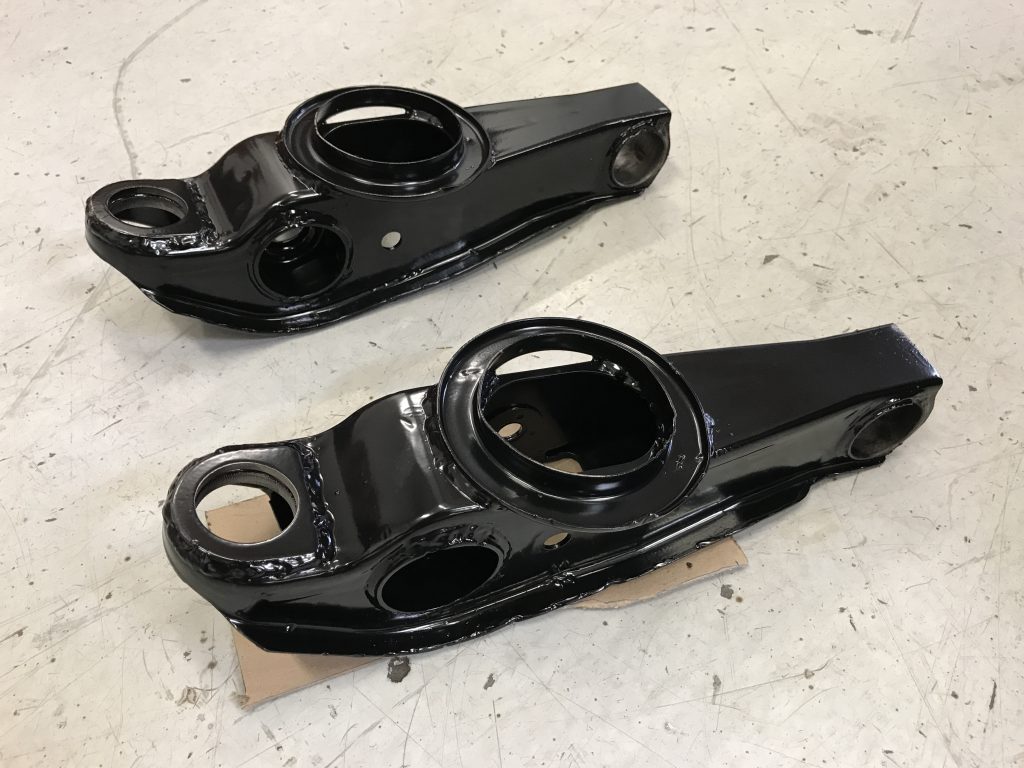
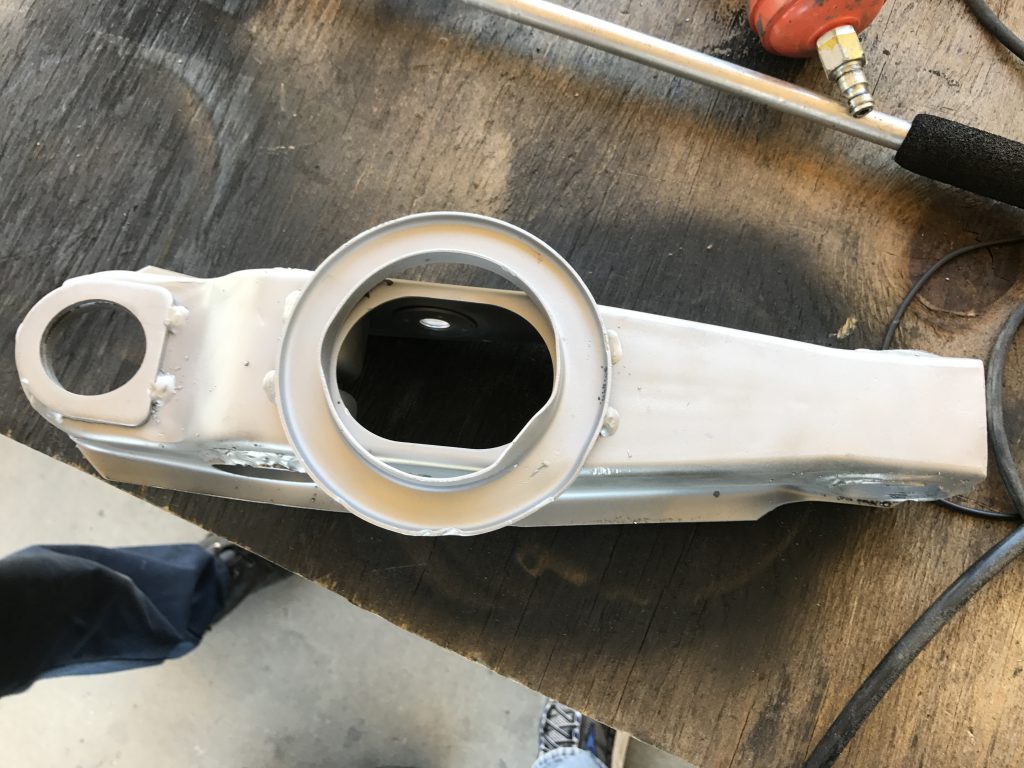
After another trip to the blasting cabinet to clean up the welding marks, the arms had their turn with the powder coating gun. And they came out amazing – better than new in every way.
Once the coating was fully cooled, new bushings and ball joints got pressed in to the arms and it was time to start installing.
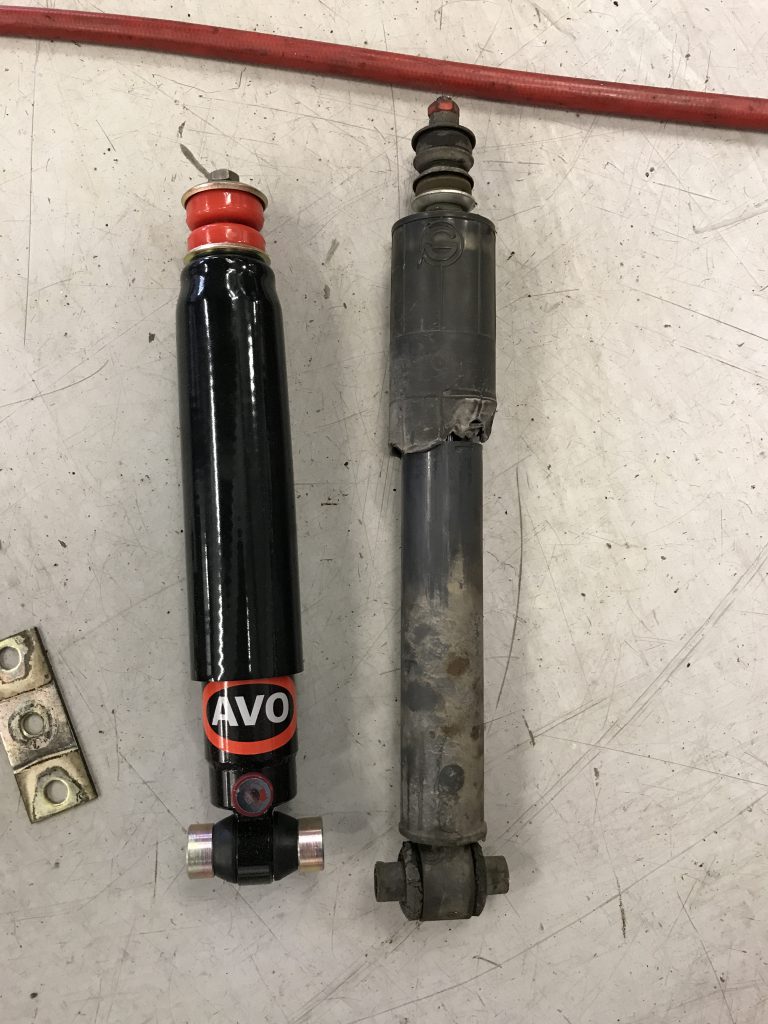
New and old front shocks. The front ones don’t have the adjustable ride height, but do have the variable damping valve. You can see where the previous attempt at lowering the car with a blowtorch melted the collar around the old shock. This will be a huge improvement. Also, historically noteworthy – the red painted nut at the top of the old shock indicates that a very, very old recall was completed. The factory didn’t install a jam nut here and the shocks would come loose.
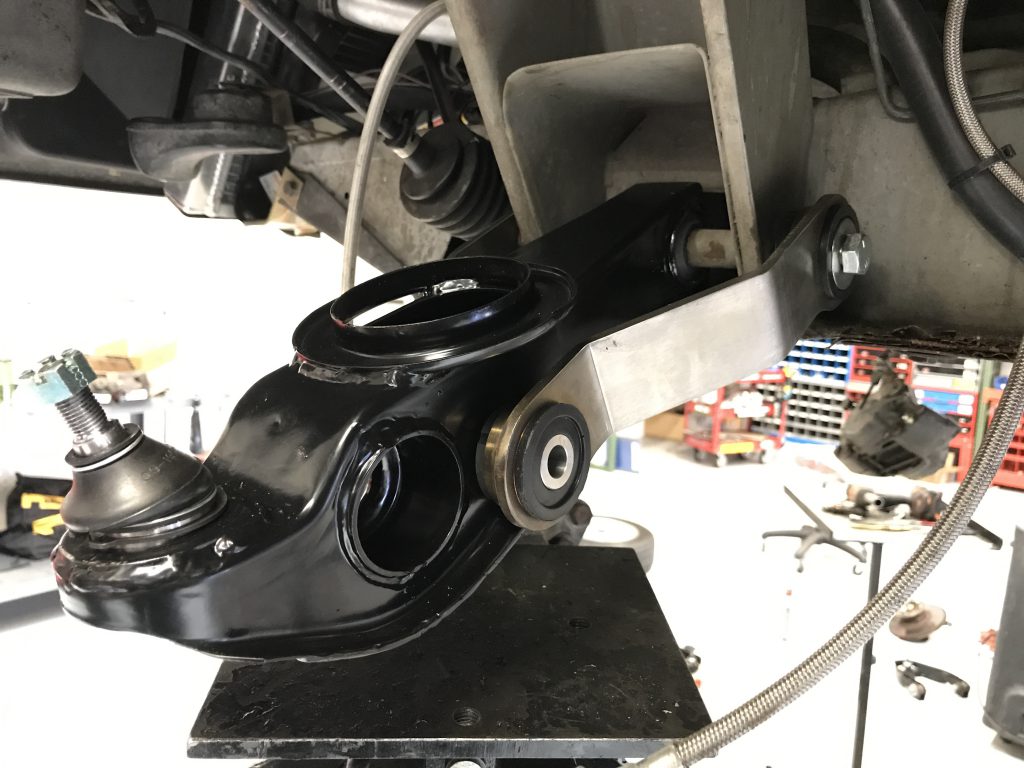
Here’s one of those freshly coated control arms, with a brand new ball joint installed and attached to the frame. You can see the stainless bracing arms here – they box in the arm and all but eliminate fore/aft motion under braking, acceleration and steering.

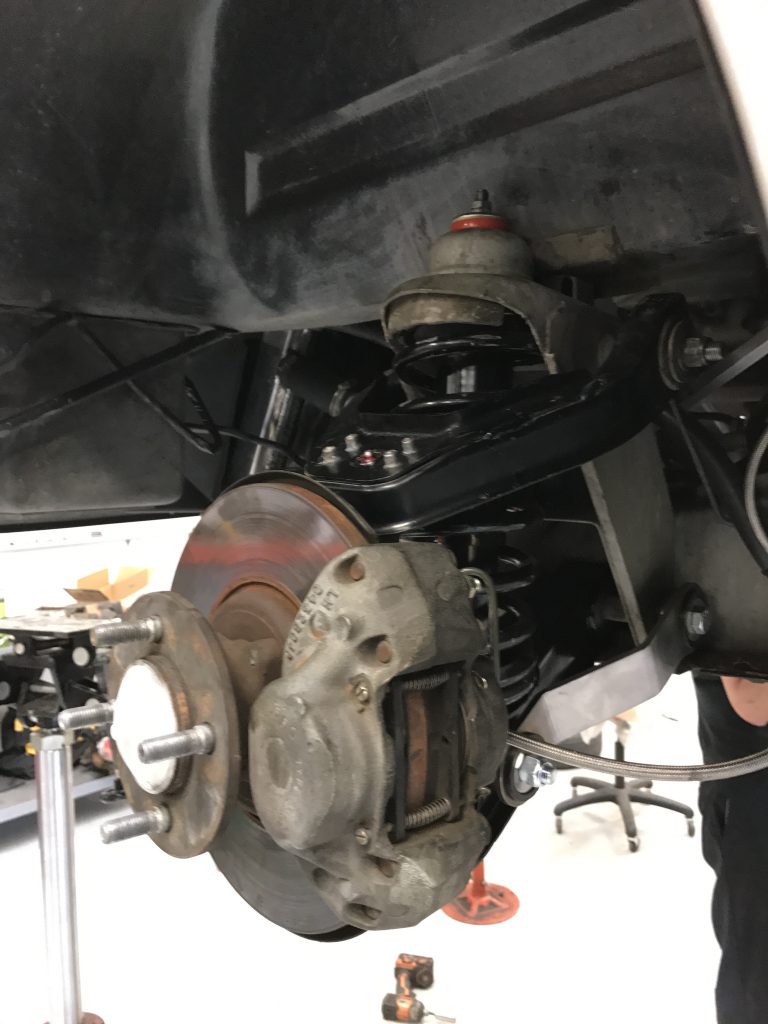
And here is the whole front driver’s side, reassembled and ready to tackle the road.

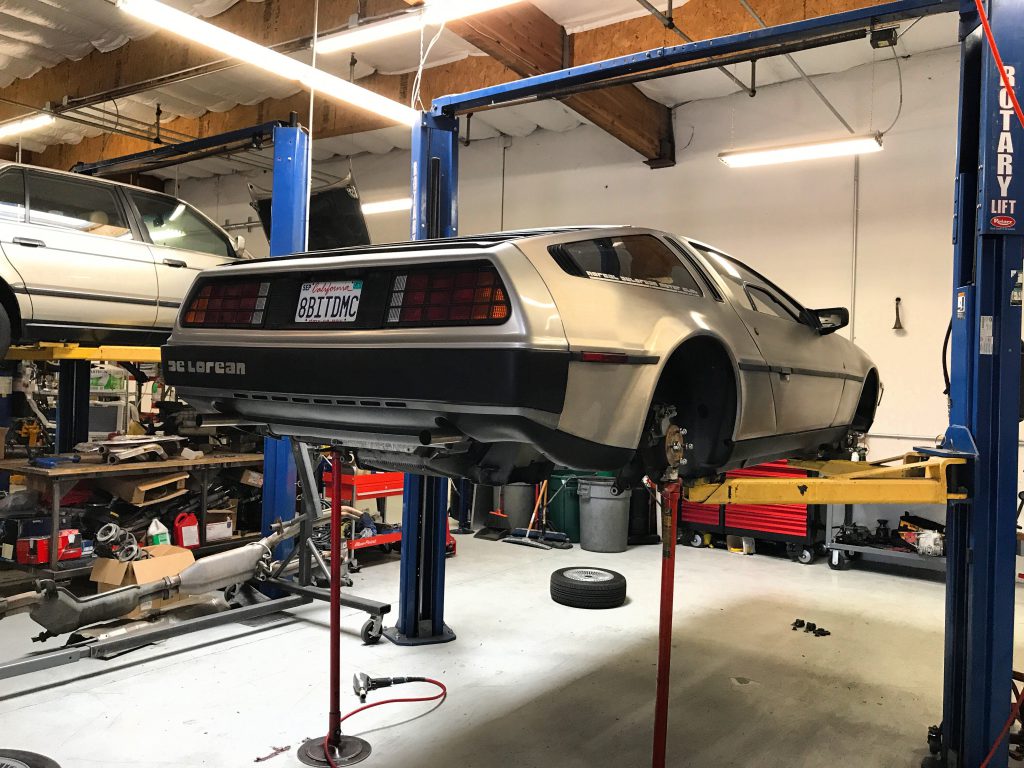
Lastly, a trip back up the alignment rack to check ride height and torque all the fasteners under load – everything looks good, so it’s road test time!
I can’t say enough good things about how it felt on that first drive. All of the front end vibration is gone. It used to nosedive so hard under heavy braking that it felt like it would dig into the ground, but now barely even leans. There’s no lash in the body when shifting gears or accelerating quickly, and the steering is at least twice as precise. Body roll is all but gone and it will no longer bottom out on driveways or shake your fillings loose on bumpy pavement.
All in all, an amazing upgrade and a really fun day. Really big and special thanks to Clint for his time, tools, skills, shop space and awesome friendship. It really pays to know the right people!